If you have a heat pump tumble dryer, you probably bought it because of its energy-saving efficiencies. But to keep enjoying the benefits of your dryer, it’s important to look after it. Here we’ll explain how to clean your heat pump tumble dryer to keep your appliance running smoothly and we also give you some bonus energy-saving tips!
Why do I need to clean my tumble dryer?
Tumble dryers naturally accumulate a lot of fluff when drying your clothes. A clogged filter means your machine will use more energy to dry your clothes, costing you more.
Cleaning your tumble dryer also helps prevent odours and keeps your appliance running efficiently – ensuring your clothes are cared for both now and in the future.
How do I clean my heat pump tumble dryer?
Incorporate this simple cleaning routine to keep the four main areas of your heat pump tumble dryer in good condition:
- After each use – clean the lint filter.
- Every few cycles – clean the evaporator filter.
- Every month – clean the drum.
- Every few months – clean the drying sensor.
Let’s take a step-by-step look at how to clean each part. Following our cleaning tips below will really make a difference to you and your machine in the long run.
How to clean the lint filter
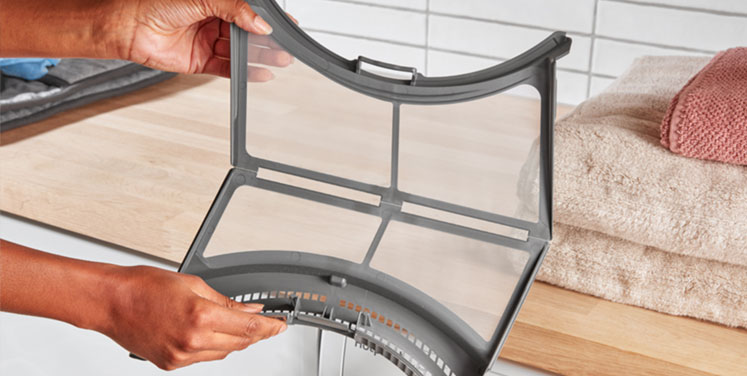
The filter is a fine mesh that catches fluff, lint and anything else from your laundry to prevent damage being done inside the machine and keep it running efficiently. You need to clean this after each use – here’s how:
- Make sure the tumble dryer has cooled down.
- Open the door and remove the lint filter from the front by pulling up.
- The filter will open like a book – wipe the dust and lint away by hand or with a soft cloth.
- Close the filter and pop it back in the housing.
We recommended giving the filter and housing a deep clean every few months. Just wash the filter under the tap and use a vacuum cleaner on a low suction setting to clean the lint filter housing. Make sure the lint filter is completely dry before you replace it.
How to clean the evaporator filter
Your evaporator filter should be checked and cleaned every few cycles to maintain drying performance. Here’s your step-by-step guide:
- Press the kick plate button to open the kick plate.
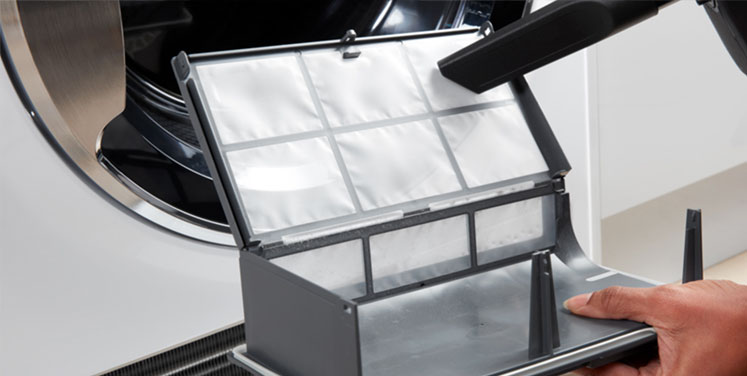
- Remove the evaporator filter drawer.
- Use a soft-bristled brush to gently clean the evaporator fins behind the filter by brushing them upwards and downwards. Or use protective gloves to clean it by hand – be careful, as evaporator fins can be sharp. If the evaporator is dry, you can use a vacuum cleaner in the same up-and-down motions.
- Open the evaporator filter and clean with a vacuum cleaner or damp sponge and, if needed, rinse through under running water.
- Ensure the filter is dry before replacing.
- Close the kick plate cover.
How to clean the drum
Cleaning the drum will help avoid unpleasant smells from your tumble dryer. Give it a once-over every month:
- Spray or dip a cloth into a non-abrasive cleaning product, or a solution of white vinegar and water.
- Wipe over the whole of the drum and the inside of the door.
- Leave the door open to let it dry.
- Use the same solution to wipe down the front, sides and back of the machine while you’re at it to keep everything looking tip-top.

How to clean the drying sensor
The sensor is a key component of your tumble dryer. It helps detect if clothes are wet and automatically turns off the cycle when they’re dry. Keeping it clean will help save energy by avoiding extended drying times. It’s a good idea to clean it every few months – here are the steps to follow:
- Allow the tumble dryer to cool down.
- The sensor is behind the lint filter in the front of the door opening.
- Wipe the metal surfaces of the sensor bars with a soft cloth.
- You can dampen the cloth with white vinegar (avoid using any abrasive cleaning products).
- Ensure you’ve dried the sensor bars with a soft cloth before using your tumble dryer again.
Bonus energy-saving drying tips
- Avoid opening the door during a cycle – as heat pump tumble dryers don't use a heating element, they can take longer to reach optimum drying temperature, meaning that if you open the door and interrupt the cycle it could result in extra running time and increased energy consumption.
- Location, location, location – a dryer placed in a warm area of your home with a regular heat source will require less energy to heat the air to the required temperature, which will cut your energy costs. Cold garages, sheds and rooms with multiple external walls should be avoided as these tend to be the chilliest areas, which results in increased drying times and energy consumption.
For more ways to save energy each time you use your dryer, take a look at Hotpoint’s 5 top tips for energy-efficient drying this winter for some simple steps you could easily benefit from today.




.png)


